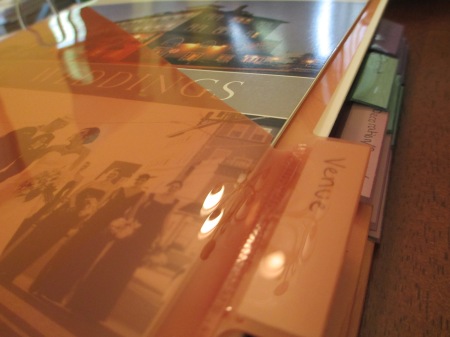
I wanted to share with you my very first wedding project! I had a lot of fun with this and I think it turned out pretty well, if I do say so myself! I am a self-identified organizational freak (in a good way), so I have a lot of fun getting organized for long-term projects like planning a wedding. Pretty much the first thing I did after getting engaged was to go by the store and pick up a 3″ binder and 20 tabs with pockets. I actually only used 18 tabs, but the ones I got came in a 5-pack, so I went ahead and just got 4 of those. I like the ones with pockets because you can slip anything you want inside of them; whether it’s receipts, brochures, business cards, or pictures from magazines.
My next step was to create a list of all the tabs I wanted to have. Like I said earlier, I decided to use 18 tabs, I labelled these (in order):
- Important Info
- Ceremony
- Reception
- Venues
- Photographer
- Caterer/Cake
- Florist
- Decoration/favors/gifts
- Entertainment
- Bride
- Groom
- Wedding Party
- Registry
- Invitations/save-the-dates
- Bachelor/Bachelorette Parties
- Rehearsal Dinner
- Honeymoon
- New Home ❤
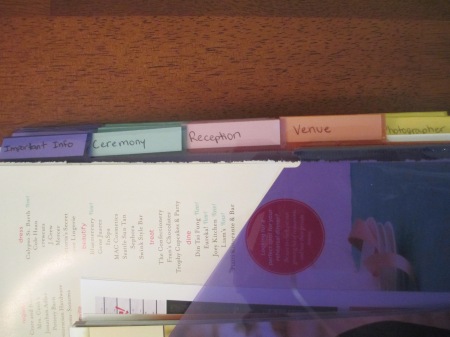
I made a sort-of table of contents for my binder with a list of all the tabs and what kind of information goes in which tab. I’ve stuck this sheet in the front pocket of my binder so that I can easily reference it.
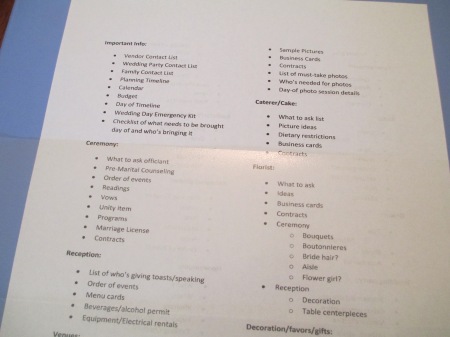
Most of these are pretty self-explanatory. For example, the ceremony tab covers the officiant info, order of events, readings, programs, marriage license, etc. and the reception tab covers who’s giving toasts, the order of events, menu cards, rentals, permits, etc. In the important info tab, I’ve included contact lists for the vendors and wedding party, a wedding planning timeline (that I created myself), a calendar, budget spreadsheets, a day-of timeline, the wedding day emergency kit checklist, and a checklist of who’s bringing what the day-of. I’ve also included a “new home” tab because we currently don’t live together and will be moving into a new place together once we get married. I wanted to have a tab to keep all of the info about different apartments, budget, and decorating ideas in one place.
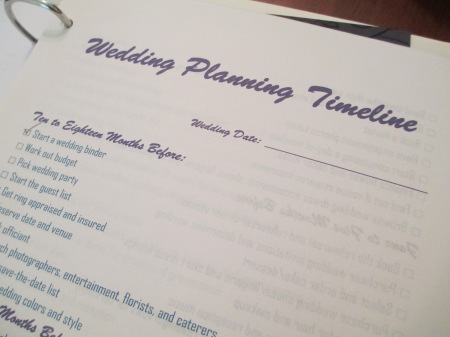
As I mentioned before, I created my own wedding planning timeline. I did this by looking through a bunch of different timelines that I saw on pinterest and in magazines and just including what was relevant to us. In the picture I don’t have the wedding date filled in yet because we don’t have one yet! We wanted to choose our perfect venue and then choose a date based off of when our venue was available. Hopefully I’ll be able to fill that in soon!
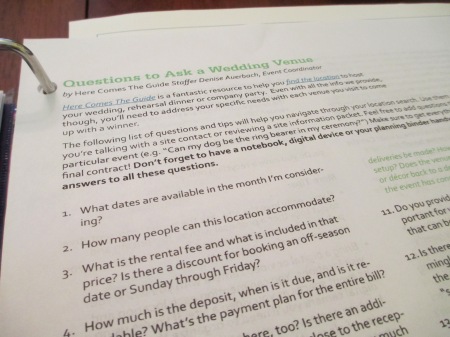
Next I searched around on pinterest, various wedding blogs, and wedding magazines to find helpful lists and tips for planning as well as ideas for attire and decoration. I printed out a couple of “questions to ask” such-and-such vendor sheets, which have been very helpful. I also pulled pictures out of magazines to slip into the pockets on the tabs so that I can refer to them later.
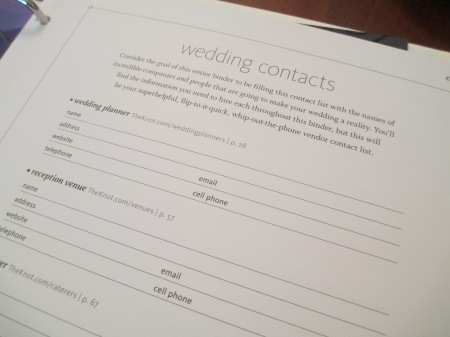
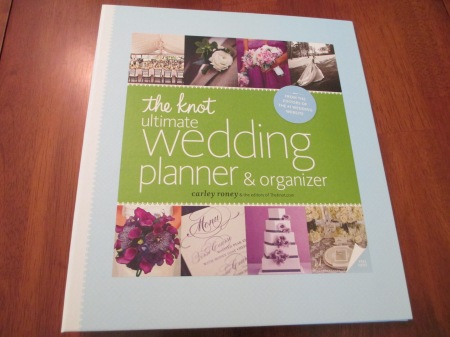
After I’d finished setting up my binder, my mom actually surprised me by buying me the knot’s wedding planner. Since I’d already made my binder, I decided to transfer all of the helpful sheets from the knot’s guide into my own binder, which was a relatively easy task to do.
Finally my wedding binder was done! I absolutely love it! I wanted to put a cover on it so I originally grabbed some card stock and hand wrote our names as well as the chorus of our song on it, but I wanted something a little different. So I instead decided to make a collage of pictures of us through the years and printed that out. You can actually see the first cover behind the collage because I just decided to leave it in. I also grabbed a ribbon and tied it around the binder because I thought it would add a cute touch to it.

I hope you found this post interesting and helpful. Let me know if you’ve done anything similar, I’d love to see other wedding binders!
~Heather
